It’s official. Universal Analytics has been retired, making Google Analytics 4 the go-to for future Google Analytics business insights. By this point, GA users may already have a GA4 property either manually created or auto generated for us. New GA users may just be getting started with a new property entirely. Either way, there are some first steps we can take to start getting our new GA4 property up and running.

You have your GA4 Property. Now what?
Whether it be migrated by hand, auto generated by Google, or a new clean slate entirely, our GA4 properties need some extra tweaks to ensure that they are working properly and can start being used in our business strategies.
Choose your Preferred Report Collection
As you browse your GA4 property and read Google’s documentation on it, you may notice that your property looks different from the documentation. Specifically, when you look at your Reports, you may find that the category of reports you have varies from what you’ve seen in both the documentation and other tutorials.
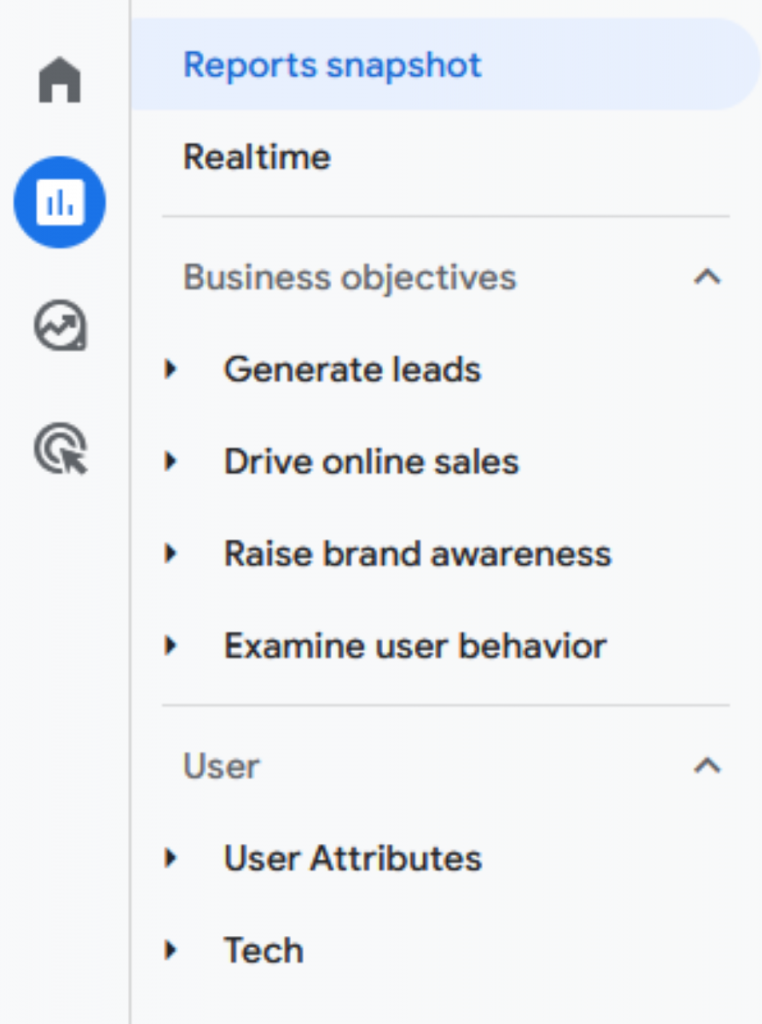
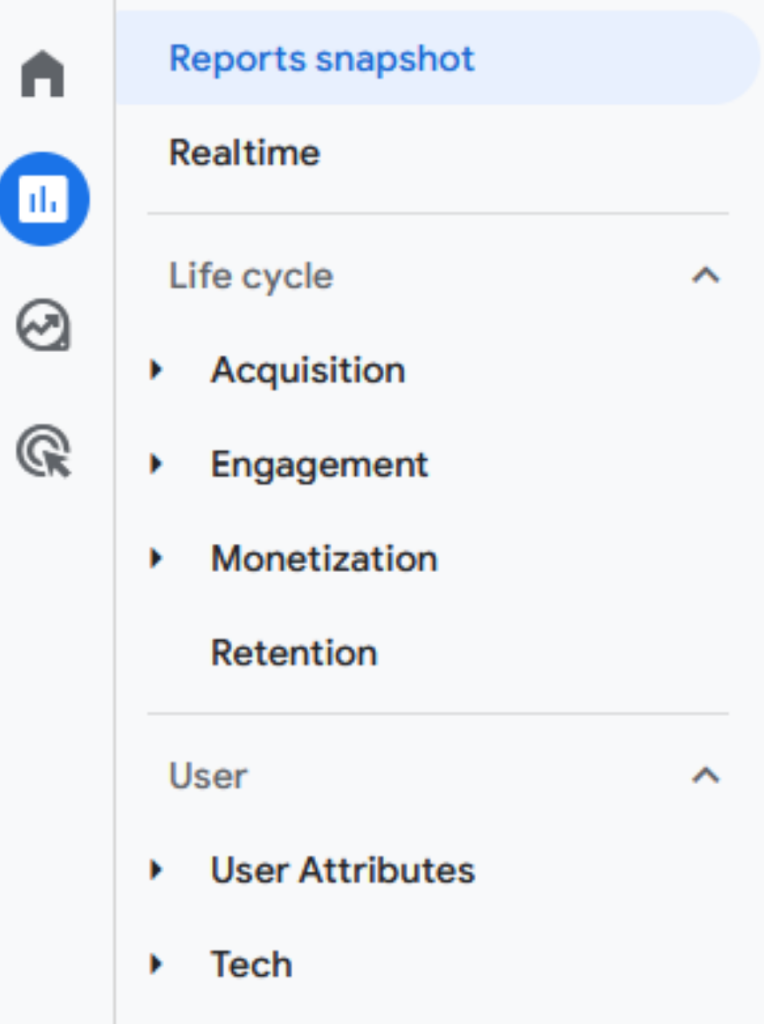
In GA4, there are two types of report collections you could have: Life cycle reports and Business objectives. Both collections contain the same reports but organize them differently to fit the type of goals they assume you have. While Life cycle reports are the default report collection, you may find that your reports fall into the Business objectives Collection. This is caused by options you checked during the creation of the property.

When answering Google’s prompt concerning your business objectives, if you chose any of the first four options rather than the baseline option, your property would be installed with the Business objective collection. Currently, no collection is better than the other, so having one collection over the other isn’t a detriment to your analytics. However, if you prefer a certain collection, you can change or add that collection into your reporting category.
To change or add a report collection to your GA4 property, you will need to do the following:
- Log into Google Analytics.
- Make sure you in the correct account and GA4 property.
- In the left-hand column, click Reports.
- At the bottom left-hand side of your reports collection, click Library.
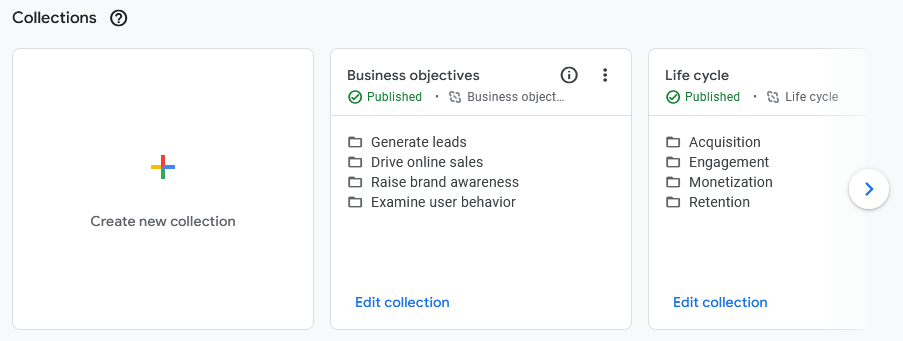
- In the first row called Collections, you will see both the Business objectives collection and Life cycle collection.
- Click the three dots of the collection you want to either use or remove. Click Publish or Unpublish to add or remove the collection from your report tab. Note that you can have both collections if you want to experiment!
Review the Change Log
For GA users who had their Universal Analytics (UA) property auto-migrated by Google to GA4, it may be useful to review the changes and steps that were taken to create your new GA4 property. By reviewing the change log, you can better understand what parts of your UA property Google was able to migrate over, allowing you to identify any sections that you will need to migrate on your own. To do this, you can take a look at your property’s change log.
To access your change log, you will need to do the following:
- Log into Google Analytics.
- Make sure you in the correct account and GA4 property.
- In the bottom left-hand corner, click the gear icon for Admin.
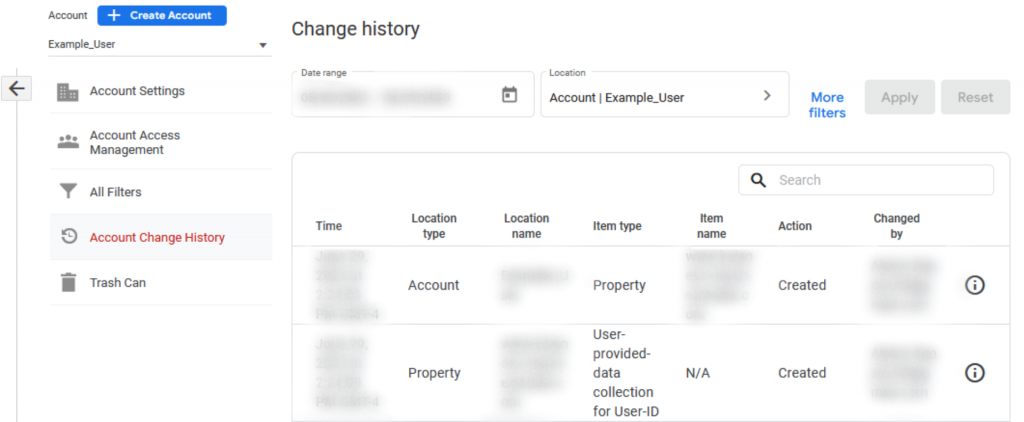
- In the Account column, select Account Change History. Here you can see the changes made to the property and filter them via date, location, and more!
Check out your Setup Checklist
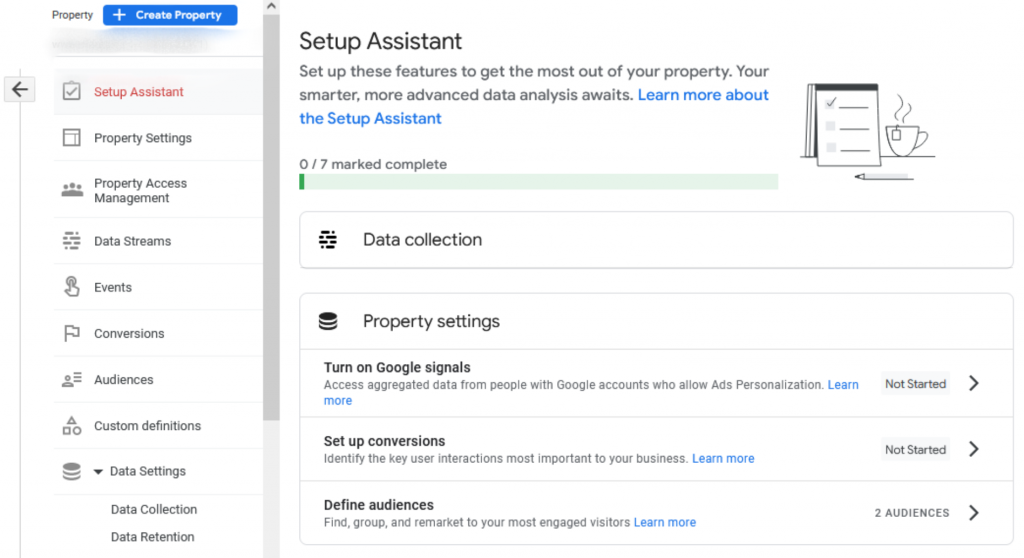
All GA4 properties come with a checklist that you can use to set up basic analytics. Some steps in the checklist are a must while others are optional depending on your goals and existing analytics strategy. Overall, the GA4 checklist is a great place to get started, whether you are a veteran of GA or brand new.
To view your checklist, you will need to do the following:
- Log into Google Analytics.
- Make sure you in the correct account and GA4 property.
- In the bottom left-hand corner, click the gear icon for Admin.
- In the Property column, select Setup Assistant. Here you will find Google’s setup checklist to help guide you. Note that some of the tasks may not suit your needs. If that’s the case, click the arrow on the right-hand side and click Mark as complete for any tasks that are either finished or unnecessary.
Make sure your Property is Collecting Data
For our GA4 property to be of use to us, setting up a connection between our new property and our website is one of the most important steps. Without data to collect, our reports are currently useless. For GA users who were auto migrated to GA4, your property may already be collecting data via a Google Tag Manager tag. However, it’s important to double check that your data stream is working properly.
To check if your site is connected to your GA4 property, you will need to do the following:
- Log into Google Analytics.
- Make sure you in the correct account and GA4 property.
- In the bottom left-hand corner, click the gear icon for Admin.
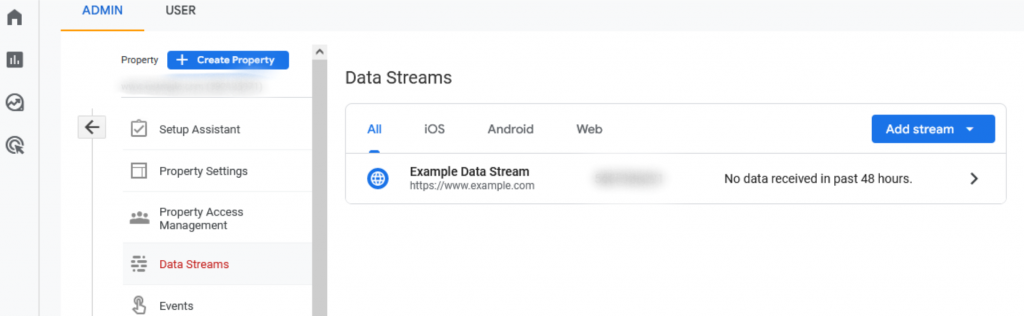
- In the Property column, select Data Streams. Here you will see your data stream. There is usually only one data stream per property. Right away, in the right-hand side of the data stream, you will see if your property has been receiving data from your websites. If the message No data received in the past 48 hours is there, your property may not be connected, incorrectly connected, or hasn’t processed the connection yet.
If your data stream is not collecting data, you will need to manually set up a connection between your site and your GA4 property. For further instruction on how to do this, read our blog on the three main methods to connect your website to GA4.
Update the Default Data Retention Settings
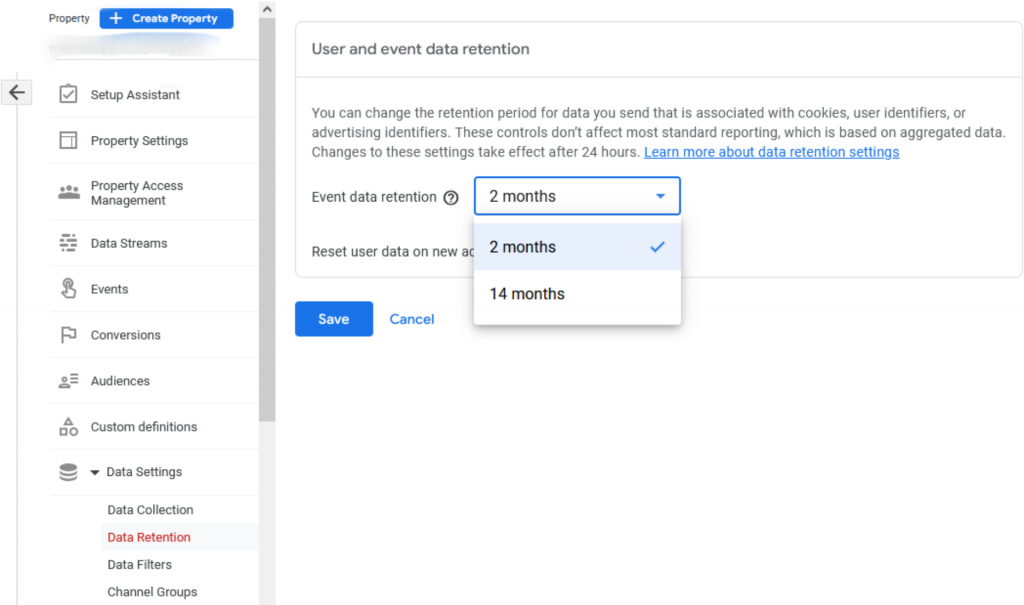
With a new GA4 property, your property may be set to retain only 2 months of data by default. For many of us, 2 months of data retention can negatively impact our business strategies since we wouldn’t be able to establish trends that take place over the course of months. Lucky for us, this setting can be updated.
To update the default data retention settings, you will need to do the following:
- Log into Google Analytics.
- Make sure you in the correct account and GA4 property.
- In the bottom left-hand corner, click the gear icon for Admin.
- In the Property column, select Data settings -> Data Retention. Here you will find your current data retention period and can change is by clicking the small arrow. You can retain data for either 2 months or 14 months.
Add a Filter for Personal Traffic
When analyzing your reports, you want the numbers involved to be accurate. One way to make sure your reports are correctly reflecting your website’s traffic is to filter out yourself from that traffic. We often browse our own sites for the sake of testing and review, however, that traffic can be included in your reports as customer traffic. To keep both you and your team’s traffic from muddling your reports, we can tell our GA4 property to ignore our interactions with our sites.
To filter out your personal traffic, you will need to do the following:
- Log into Google Analytics.
- Make sure you in the correct account and GA4 property.
- In the bottom left-hand corner, click the gear icon for Admin.
- In the Property column, select Data Streams.
- Select your data stream. Then, click Configure tag settings.
- On the right-hand side of settings, click Show all.
- In the list of settings, click Define internal traffic.
- Next, click Create. Follow the prompt to create an internal traffic rule. Make sure to remember your traffic_type value for a future step.
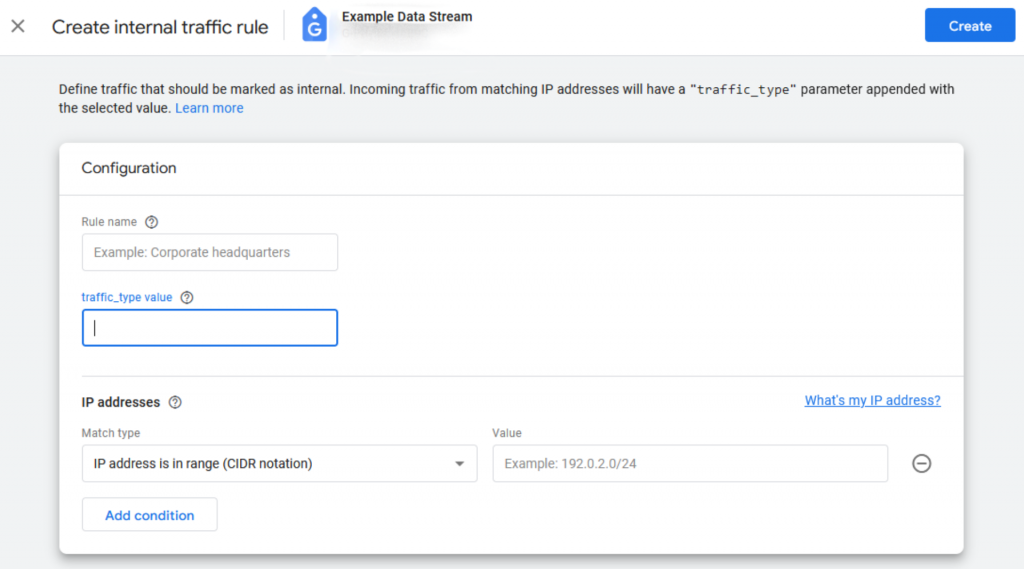
- When done, click Create.
- With our rule setup, we can now create our data filter. First, go back to Admin via the gear in the left-hand corner.
- In the Property column, select Data settings -> Data Filters.
- In the right-hand corner, click Create filter and choose Internal traffic. Complete the prompt to create a data filter. Note that the value you place in Parameter name should be the same as our traffic_value from the previous steps.
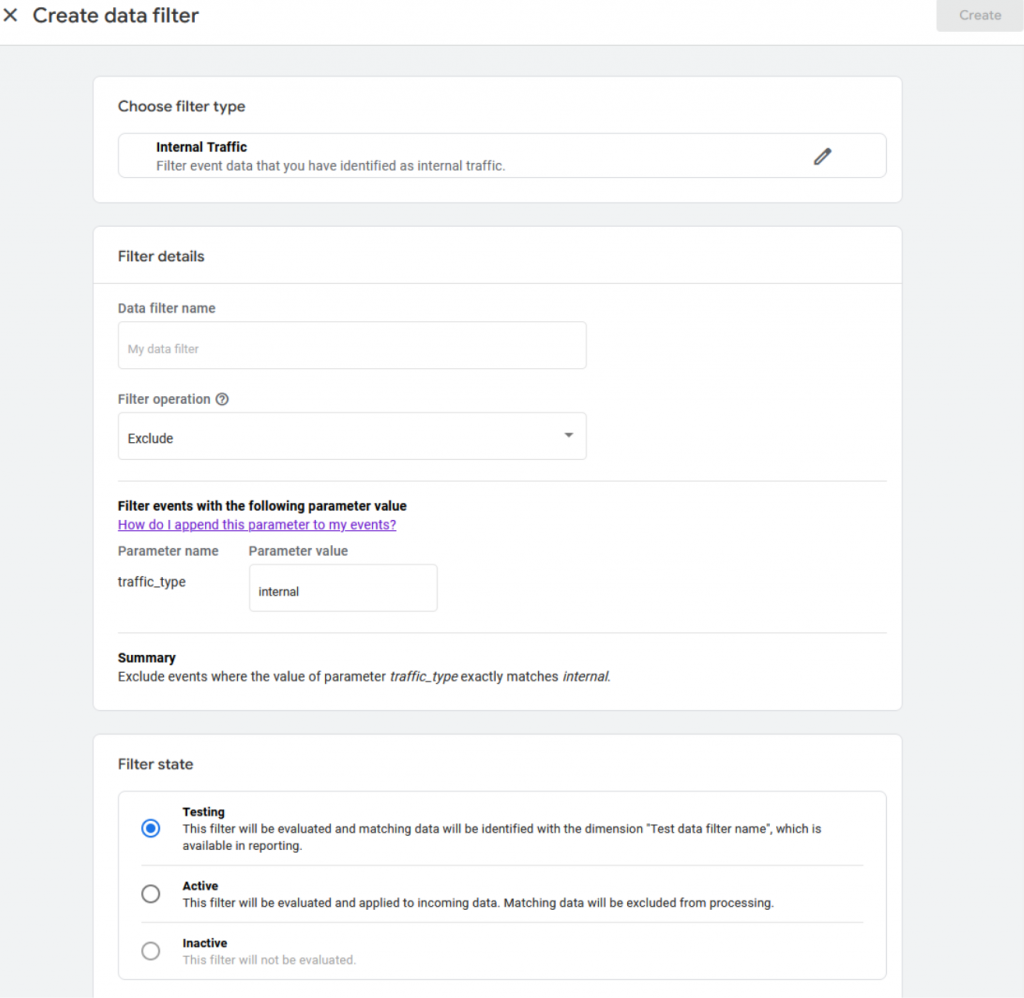
- Once done, you can create it in Testing mode to test out the filter. Once you and your developers are sure that it works, return to your data filter and change it to Active to activate the filter.
Add New Users
While setting up your GA4 property, you may want to start giving access to the property to your team. To do this, you will need to add your team members as users to the property.
To give access to your property to other users, you will need to do the following:
- Log into Google Analytics.
- Make sure you in the correct account and GA4 property.
- In the bottom left-hand corner, click the gear icon for Admin.
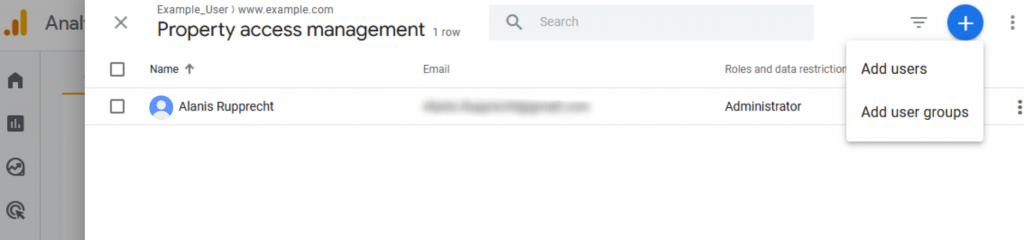
- In the Account column, select Account access management. Here you can see users who have access to the property. To add another user, click the blue + symbol in the right-hand corner and select Add users. Follow the prompt to identify your user and the roles you want them to have.
Connect any Other Google Properties you Use
If your business strategy involves other Google tools, such as Google Search Console or Google Adds, you can add sections for those tools in your GA4 property, allowing you to see everything in one place.
To connect your other Google tools to your GA4 property, you will need to do the following:
- Log into Google Analytics.
- Make sure you in the correct account and GA4 property.
- In the bottom left-hand corner, click the gear icon for Admin.
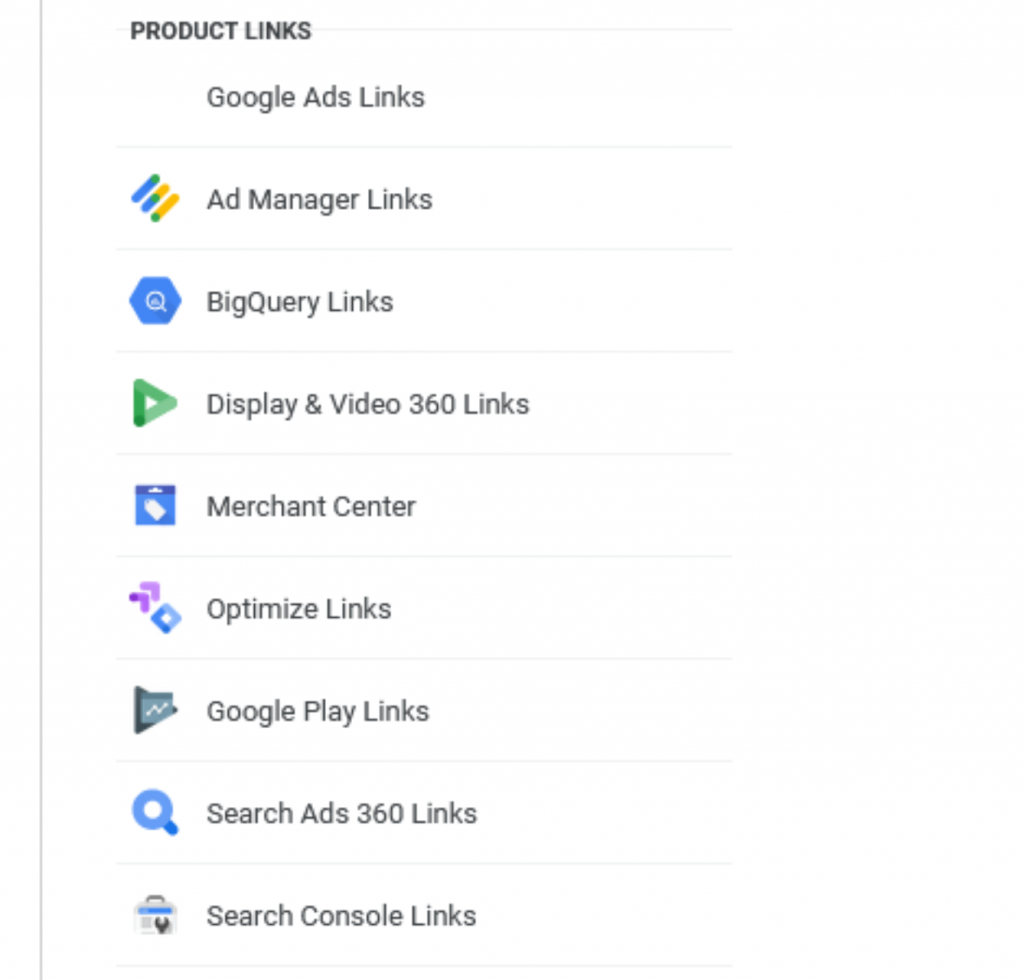
- In the Property column, scroll down to the Product Links. Under the Product Links section, you will find a collection of Google properties that you can connect to. Choose the products that you want to connect to and follow the Link button to get started.
Just getting Started with GA4?
Want to learn more about GA4? Check out our GA4 blog posts for more insights on using GA4! If you are just getting started with Google Analytics 4, take our free GA4 crash course to get started! If you want to start using GA4 but don’t have the means or time to set it up yourself, we can setup GA4 for you!