Looking to bring more customers to your site? One way that you can incentivize customers to browse your products is with digital coupons! By incorporating promotions and special deals into your email and social media marketing strategies, you can encourage customer loyalty and repeat customers. Lucky for us, making coupons in Magento 2 is quick & easy!
Coupons in Magento 2
In Magento 2, you can create coupons for your customers to use at checkout. Magento 2 supports various types of discounts that can be applied through coupon codes. You can make coupons that give percentage-based discounts, fixed amount discounts, free shipping, buy-one-get-one (BOGO) offers, and more! You can also automatically generate coupon codes in bulk. Whatever your promotional goals are, Magento 2 coupons are flexible and easy to create.
How to make a Single Coupon
If you are wanting to make a specific coupon, such as a “Spend $100 and get $20 off” discount of a “buy 4 get 1 free” discount, it may be best to create it by hand. In Magento 2, coupons are created in Cart Price Rules. There are multiple attributes that we can choose to fill in or leave blank depending on the coupon we are creating.
To get started on your coupon, we must do the following:
- First, Log into your Magento 2 Admin.
- In the left-hand menu, go to Marketing -> Promotions -> Cart Price Rules.
- Once in Cart Price Rules, go to the right-hand corner and click Add New Rule.
- When creating a coupon, there are three main sections we need to fill out: Rule information, Conditions, and Actions.
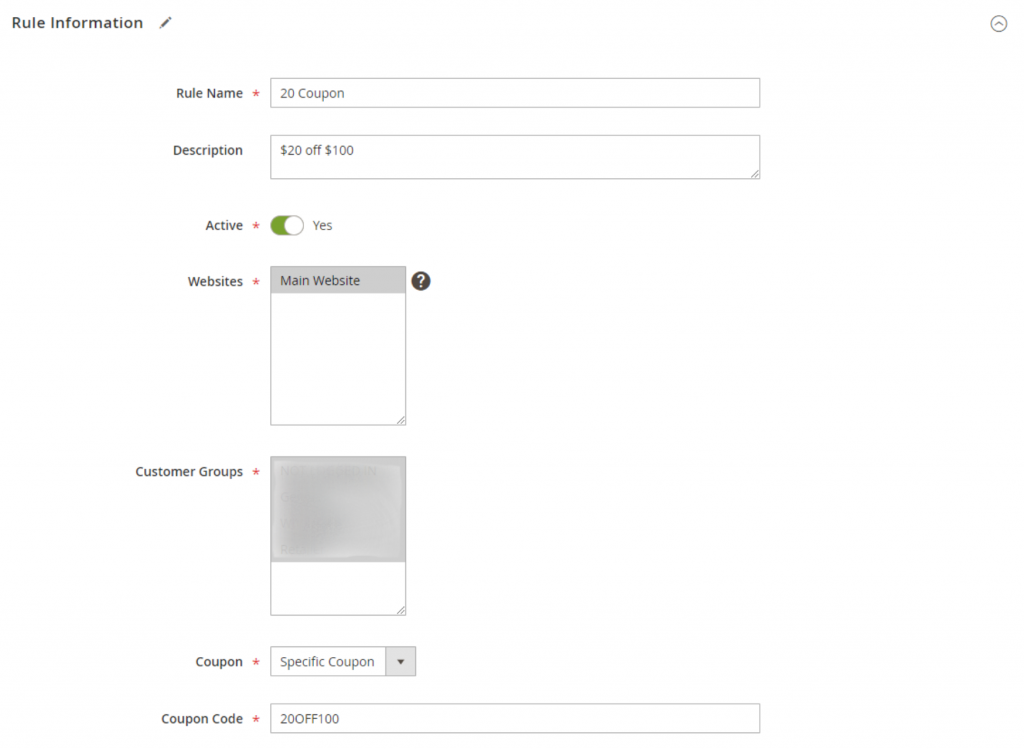
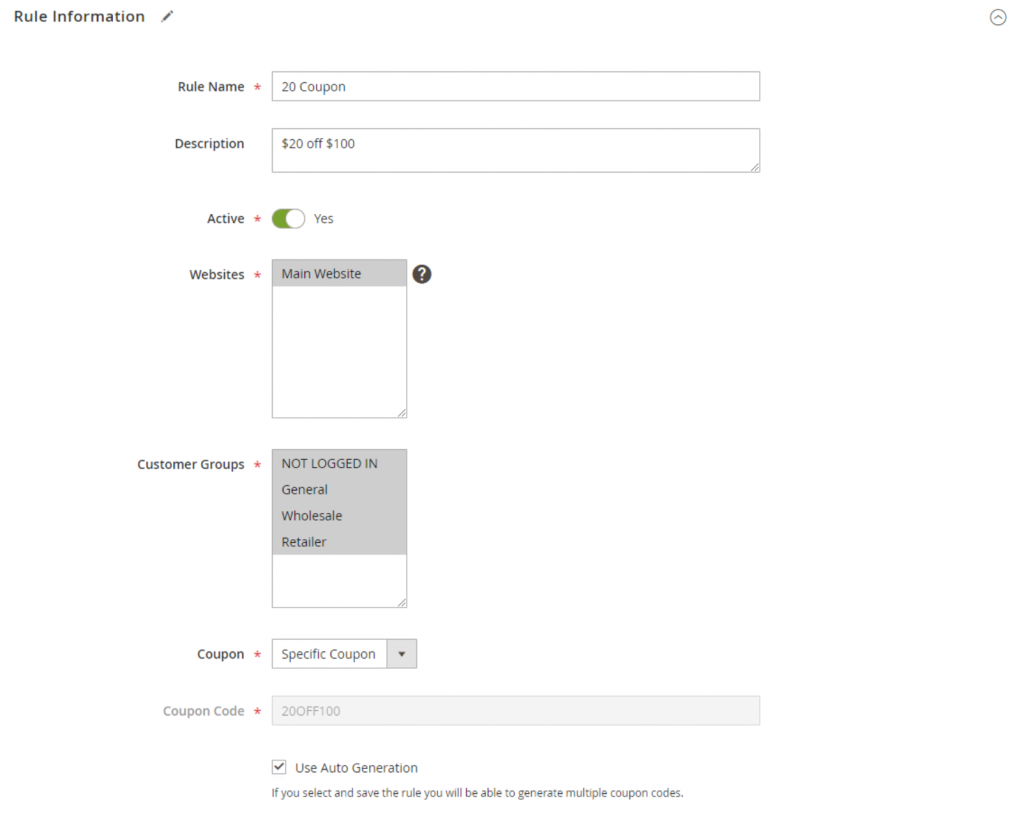
- Under Rule information, fill out the following:
- Rule Name – Internal name of your coupon.
- Website – if you have multiple websites, where does this coupon apply? If the coupon is for all of your websites, select all options by holding Ctrl + Shift on your keyboard and clicking all of your sites.
- Customer Group – If your coupon is limited to certain customer groups, which group is the coupon for? If the coupon is for everyone, select all options by holding Ctrl + Shift on your keyboard and clicking all of the groups.
- Coupon – Use the dropdown menu to select Specific Coupon.
- Coupon Code – Enter the code for your coupon. If we are using the $20 off $100 example, we may put “20OFF100.”
- Uses per Coupon – How many times can the coupon be used? If this coupon is for a specific customer, such as a special email deal, we may want to set the number of uses to “1.” If this coupon is for everyone, we may want to leave it blank.
- Uses per Customer – How many times can a customer use the coupon? In general, we may want to set this to “1” so that customers can’t repeatedly use the coupon. If it is a coupon that customers can use an unlimited number of times, we will want to leave it blank.
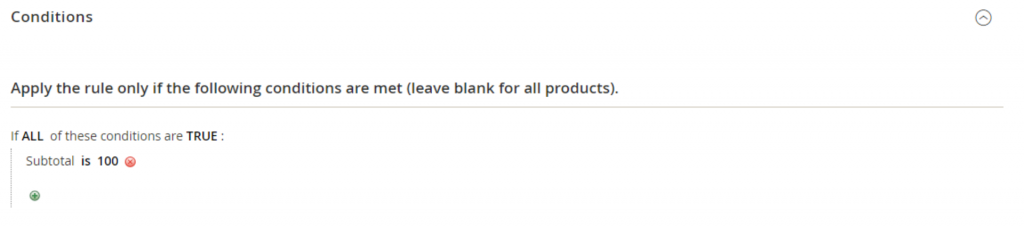
- Under Conditions, we will determine the conditions needed in order for the coupon to be valid:
- Click on the small green plus symbol.
- Using the Please choose a condition to add dropdown menu, select what part of the purchase the coupon is based on. For example, if the coupon is based on price, we may choose “subtotal.”
- By selecting a condition, the condition will appear. Click the … by “is” and fill in the blank for the condition. In the case of our $20 off $100 example, we would type the amount that the subtotal must be in order to qualify for the coupon: “100.”
Note: If your coupon applies to all products, do not set a condition
The conditions section of your coupon only needs to be filled out if there are specific products or spending thresholds that customer must reach to get the discount.
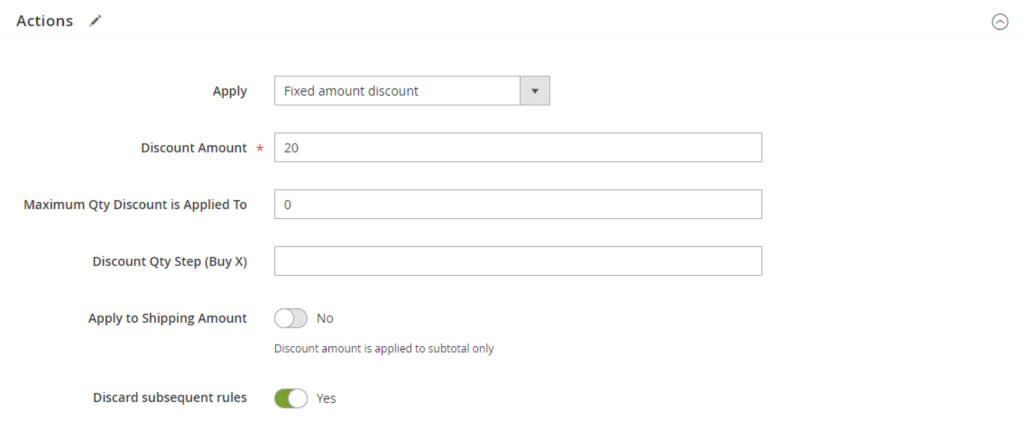
- Under Actions, fill out the following:
- Apply – using the dropdown menu, select how the discount works. Using our $20 off $100 example, we may select a “Fixed amount discount.”
- Discount Amount – How much is your discount? In our example of $20 off $100, we would put “20.” If you were doing a BOGO coupon, you would put the number of additional items the customer would get free.
- Maximum QTY Discount is Applied To – if your coupon is quantity restricted, enter the max number of items that the coupon will discount. If your coupon is not related to quantity, leave as “0.”
- Discount QTY Step (Buy X) – if your discount applies depending on the number of items purchased, such as a BOGO coupon, you will put the number of items that need to be in the cart before the discount applies. For example, a Buy 4 get 1 Free deal would mean that this quantity would be “4.”
- Once done, click Save in the right-hand corner. Congrats! Your coupon is ready to test and use!
Note: Make sure to test your coupons
As with any new additions or changes to our websites, testing is important. Make sure to that your coupon works correctly. Using our $20 off $100 example, add $100 worth of items to a cart and apply the code to see if the $20 discount is applied. If it is a BOGO coupon, add the appropriate type and number of items to your cart and apply the code to see if the correct number of the items are discounted.
How to make Auto-Generate Multiple Coupons
If you wanted to create multiple coupons of the same type, such as creating 10 coupons that give $20 off a cart above $100, there are a few additional steps we need to take.
To auto-generate coupons in bulk, we must do the following:
- First, Log into your Magento 2 Admin.
- In the left-hand menu, go to Marketing -> Promotions -> Cart Price Rules.
- Once in Cart Price Rules, go to the right-hand corner and click Add New Rule.
- First, we need to create our coupon just as we did when creating our single coupon above. Fill out the Rule information, Conditions, and Actions sections based on the kind of discount you want these coupons to have.
- Once you have completed the basics of your coupon, hit Save in the right-hand corner and re-enter your coupon.
- With the basics of your coupon created and saved, under Rule information, go under your Coupon Code and select Use Auto generation.
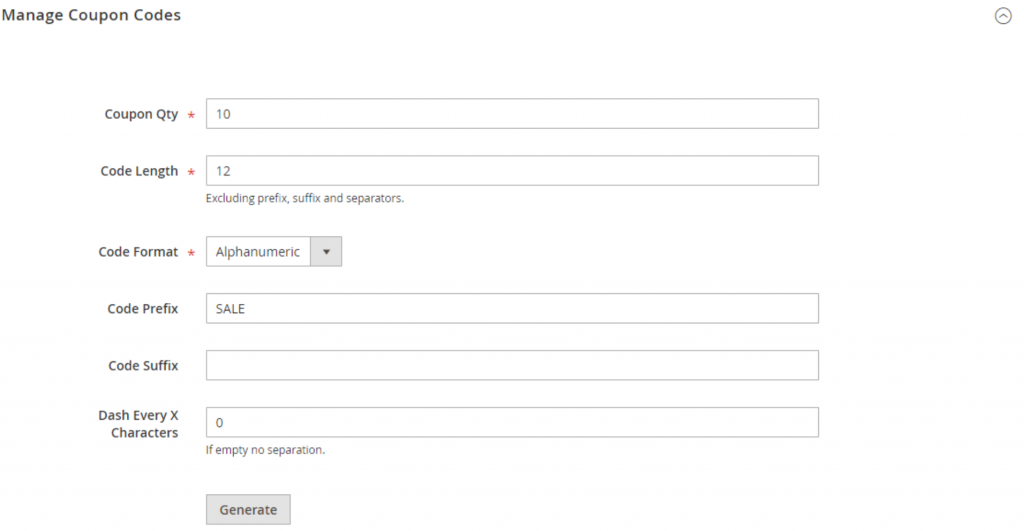
- Next, scroll down to the Manage Coupon Codes category. Here, you will need to fill out the following:
- Coupon Qty – how many codes do you want to generate?
- Code Length – how long do you want the codes to be?
- Code Format – what kind of format do you want to use? You can select Alphanumeric, Alphabetic, or Numeric.
- Code Prefix – if you want all of your codes to begin the same way, you can create a prefix here. For example, you could put “SALE” and all generated codes would begin with “SALE.”
- Code Suffix – if you want all of your codes to end the same way you can create a suffix here. For example, you could put “SALE” and all generated codes would begin with “SALE.”
- Dash Ever Character – do you want your code to be divided by dashes? You can divide a specific number of characters with dashes. This can help make the code more readable when the customer is trying to type it out.
- Once done, click the Generate button under the form. It may take a moment to generate your coupon codes. Once the codes are generated, congrats! You have multiple codes to share with your customers now!
Want to Learn More?
Want more Magento 2 content? Contact us and tell us what you would want to learn about! In the meantime, read our blog or listen in to our podcast for more tips and guides to help you through your eCommerce journey!